Step by Step Oracle 10g R2 installation on Solaris 10
August 21, 2009
My Second blog…. 🙂
Thist post is about installation of Oracle 10g R2 on Solaris 10. If you wish to install Solaris 10 on VMware heres the link.
Having installed Oracle 10g and various other releases as a part of project implementations/upgrade on various environments thought it’d be a good idea to spread the knowledge :).
I have installed Oracle 10g R2 on the Solaris 10 VM I created last week(see my earliar post).
So.. Lets get started..
Software:
Database: Oracle Database 10g R2
Pre-Installation Tasks
1. Determine the physical RAM size:
# /usr/sbin/prtconf | grep "Memory size"

Memory size: 1024 Megabytes

#
2. To determine the size of the configured swap space, enter the following command:
# /usr/sbin/swap -s

total: 360448k bytes allocated + 72480k reserved = 432928k used, 1335996k available

#
3. Ensure /tmp has atleast 400MB, you can set different “temp” location by setting the environment variables “TMP” and “TMPDIR”
# df -k /tmp
4. Ensure there is enough disk space to install Oracle Software and Create starter database:
# df -h /ora10g
Filesystem             size   used  avail capacity  Mounted on
/dev/dsk/c1t1d0s6      7.9G   8.0M   7.8G     1%    /ora10g
#
5. Determine the System Architecture
# isainfo -kv
64-bit amd64 kernel modules
#
6. Check Software Requirements
# pkginfo -i SUNWarc SUNWbtool SUNWhea SUNWlibm SUNWlibms SUNWsprot \
 SUNWtoo SUNWi1of SUNWi1cs SUNWi15cs SUNWxwfnt
system      SUNWarc   Lint Libraries (usr)
system      SUNWbtool CCS tools bundled with SunOS
system      SUNWhea   SunOS Header Files
system      SUNWi15cs X11 ISO8859-15 Codeset Support
system      SUNWi1cs  X11 ISO8859-1 Codeset Support
system      SUNWi1of  ISO-8859-1 (Latin-1) Optional Fonts
system      SUNWlibm  Math & Microtasking Library Headers & Lint Files (Usr)
system      SUNWlibms Math & Microtasking Libraries (Usr)
system      SUNWsprot Solaris Bundled tools
system      SUNWtoo   Programming Tools
system      SUNWxwfnt X Window System platform required fonts
#
If you do not find any patches installed, use the following command to add the packages:
#pkgadd -d /cdrom/sol_10_1106_x86/Solaris_10/Product <Package Name>
7. Hostname / Domain Name Checks:
If you use DNS:
#cat /etc/nsswitch.conf | grep hosts
In this case I did not use DNS, so I’d do the following:
# hostname
orasun02
# domainname
XYZ.com
# cat /etc/hosts | grep `eval hostname`
192.168.1.106   orasun02.XYZ.com         orasun02        loghost
#
8. Creating Oracle User and Groups
- Create Oracle Inventory Group(oinstall)
# /usr/sbin/groupadd oinstall
- Create OSDBA group (dba)
# /usr/sbin/groupadd dba
- Create Project Group
# projadd group.dba
# projects -l group.dba
group.dba
 projid : 101
 comment: ""
 users  : (none)
 groups : (none)
 attribs:
#
- Add resources to project “group.dba”
#projmod -sK "project.max-shm-memory=(privileged,2G,deny)" group.dba
#projmod -sK "project.max-sem-ids=(privileged,100,deny)" group.dba
#projmod -sK "project.max-shm-ids=(privileged,100,deny)" group.dba
#projmod -sK "project.max-sem-nsems=(privileged,256,deny)" group.dba
- Create “oracle” user
#useradd -g oinstall -G dba -m -d /export/home/oracle -s /bin/ksh -K project=group.dba oracle
- Set the password of the oracle user:
# passwd -r files oracle
- Verify user “nobody” exists:
# id nobody
uid=60001(nobody) gid=60001(nobody)
#
9. Creating Directories
#mkdir -p /ora10g/oracle/
#chown -Rh oracle:oinstall /ora10g/oracle
#chmod -R 755 /ora10g/oracle
10. Login to user “oracle” and edit “.profile” to set ORACLE_BASE,ORACLE_HOME,etc
# Oracle Settings
TMP=/tmp; export TMP
TMPDIR=$TMP; export TMPDIR
ORACLE_BASE=/ora10g/oracle; export ORACLE_BASE
ORACLE_HOME=$ORACLE_BASE/product/10.2.0/db_1; export ORACLE_HOME
ORACLE_SID=ORCL; export ORACLE_SID
PATH=$ORACLE_HOME/bin:$PATH; export PATH
Installation
- Allow user “oracle” to use the display(Here I assume you’d be using Xterm like Xorg/XSun/vncserver/etc, so login as “root” and issue the following command:
#/usr/openwin/bin/xhost +
Ensure the display is working for user “oracle”
# su - oracle
$DISPLAY=orasun02:0.0
$export DISPLAY
$/usr/bin/xclock
$

- Unpack the Oracle 10g Software:
#unzip -o 10201_database_solx86_64.zip
- Invoke “runInstaller”
# ./runInstaller
- Select Installation Method, I have chosen “Advanced Installation” and click “Next”

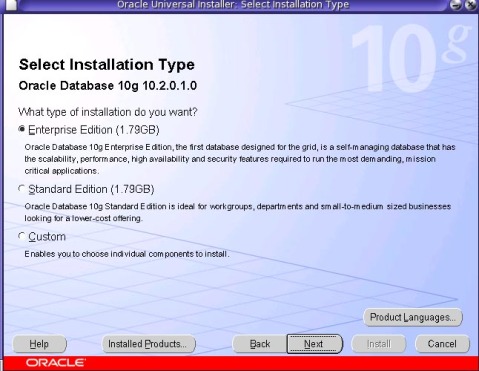
- Select Installation Type, I have chosen “Enterprise Edition”, Click “Next” to proceed further
- Specify Oracle Home details, this is already picked up as we specified in .profile, confirm if its right , alternatively change as desired. Click “Next” to continue

- Now Oracle does Product Specific Pre-requisite Checks, if you see it failed with 2 warnings and if you notice we have not set the kernel parameters shown in the sceenshot. This is fine as in Solaris 10 the resources are managed through the resource control, as we have configured in step 8.

- Select Configuration Option, Choose radio button “Create Database” and click “Next”

- Select Database Configuration , choose “General Purpose Database” and click “Next”

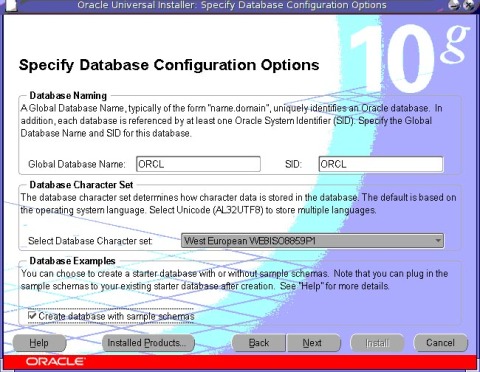
- Specify Database Configuration Options, the screen look similar to as below screenshot, and click “Next”
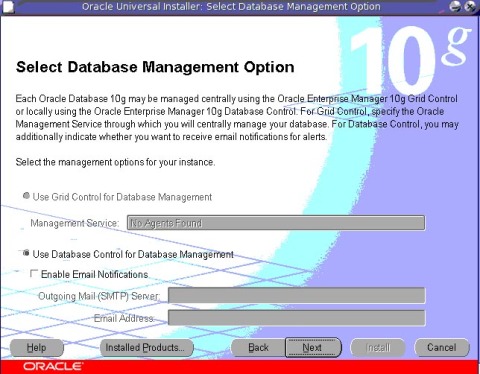
- Select Database Management Option, click “Next”
- Specify database storage option, should like the screenshot below, click “Next” to continue

- I have chosen not to enable automated backups, Click “Next”

- Specify Database Schema Passwords and click “Next”

- Finally.. click “Install” to start the installation.
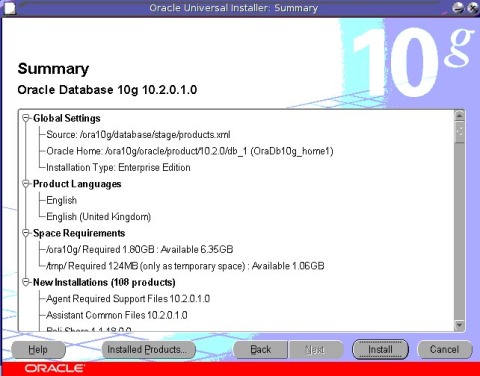
- After the installation finishes and starter database is created, Execute the configuration scripts, show in the below screenshot
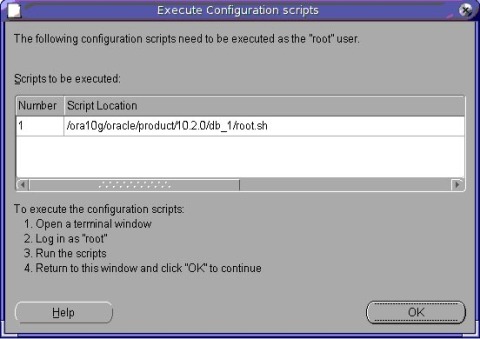
From the terminal execute the “root.sh” as user “root”:
# /ora10g/oracle/product/10.2.0/db_1/root.sh
Running Oracle10 root.sh script...

The following environment variables are set as:
    ORACLE_OWNER= oracle
    ORACLE_HOME=  /ora10g/oracle/product/10.2.0/db_1

Enter the full pathname of the local bin directory: [/usr/local/bin]:
   Copying dbhome to /usr/local/bin ...
   Copying oraenv to /usr/local/bin ...
   Copying coraenv to /usr/local/bin ...

Entries will be added to the /var/opt/oracle/oratab file as needed by
Database Configuration Assistant when a database is created
Finished running generic part of root.sh script.
Now product-specific root actions will be performed.
#
Then go back to Oracle Universal Installer screen and click “OK”
- Thats it , its the end of installation and your database should be up and running.

- Lets login to the Oracle Enterprise Manager 10g

